
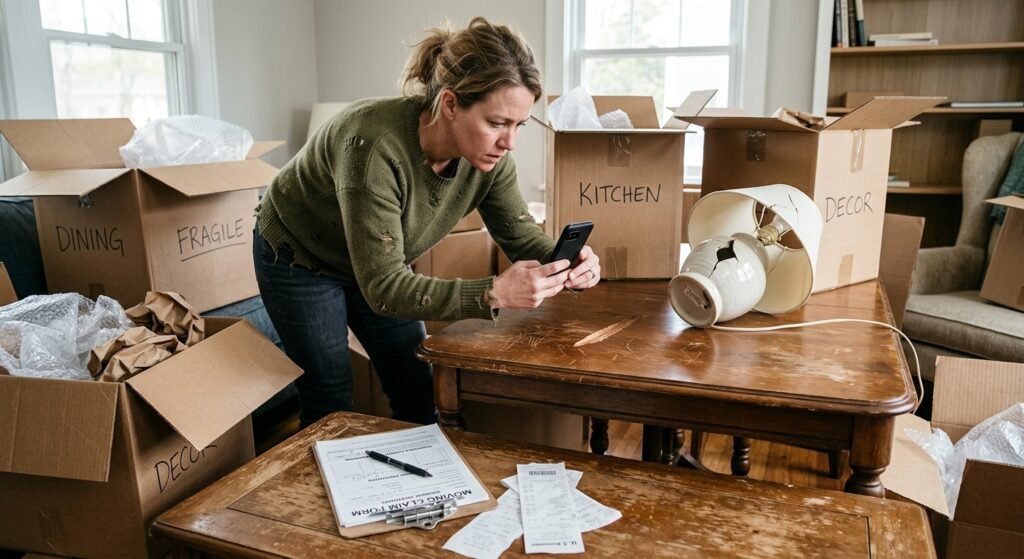
When your belongings arrive scratched, crushed, or missing after a move, your first instinct may be to call the mover and demand they fix it. But what actually makes or breaks most disputes is not who yells the loudest \\u2014 it is who has better documentation. Clear photos, organized paperwork, and specific descriptions can be the difference between a token check and a reasonable settlement.
In the moving industry, carriers make decisions based on evidence and the liability limits in your contracts, tariffs, and valuation forms. If you cannot prove what was damaged, when the damage likely happened, and what the item was worth, the claims department has many ways to reduce or deny payment. If you document moving damage correctly, you close many of those loopholes.
This guide walks you through how to document moving damage step-by-step: from your first walk-through at delivery, to photographing and listing damage, to collecting repair estimates, purchase records, and depreciation support. You will learn how to organize a complete claim file that is easy for a claims adjuster or arbitrator to understand.
This is general information for U.S. consumers dealing with household goods moves. Rules can differ for interstate versus intrastate, local, military, corporate, or international shipments. Always review your bill of lading, written estimate, tariff, and valuation election, and consult a qualified attorney or state consumer agency for specific legal advice.
Key takeaways
- Start documenting damage at delivery: walk through with the driver, note issues on the delivery receipt, and take time-stamped photos before movers leave.
- Good documentation links four things together: the item, its condition before the move, its condition after the move, and what it is worth under your valuation choice.
- Keep all moving paperwork (bill of lading, inventory, estimates, addenda, valuation forms) and use them as the backbone of your claim file.
- Use clear, specific descriptions of damage and loss; avoid vague phrases like \\”item broken\\” when you can explain how and where it is damaged.
- Organized evidence (photos, lists, receipts, repair estimates) often leads to faster, more reasonable offers because it is easier for adjusters to evaluate.
- Deadlines matter: your paperwork usually explains how long you have to file a written claim and seek arbitration or other remedies.
- Documentation does not guarantee a result, but weak documentation almost always weakens your position in negotiation, arbitration, or court.
Why documentation matters in moving disputes
Moving companies, household goods carriers, and their insurers do not pay claims based on frustration alone. They evaluate liability under federal or state rules, their tariff, and your signed contracts. Your documentation is how you prove:
- The item existed and was tendered to the mover.
- The item was damaged, lost, or delayed while in the mover\\u2019s custody.
- The condition of the item before and after the move.
- The value of the item and what you are claiming under the valuation option you chose.
For interstate moves, federal law (often referred to as the Carmack Amendment) and related regulations require carriers to process claims based on written notice and supporting documents. For intrastate or local moves, state laws or public utilities commission rules often play a similar role. In all cases, the stronger your evidence, the harder it is for the mover to argue that the damage was pre-existing, minor, or outside their responsibility.
How movers and adjusters see your claim
Adjusters typically look for reasons to:
- Limit liability based on your valuation (for example, $0.60 per pound per article).
- Apply depreciation where allowed.
- Question whether damage occurred in transit or before/after the move.
- Dispute the claimed value or repair cost.
Good documentation anticipates these questions and answers them early. Instead of simply saying, \\”my table was ruined,\\” your file can show:
- Inventory entry for dining table tagged at origin.
- Pre-move photos showing no damage.
- Delivery photos showing fresh gouges and broken legs.
- Repair estimate or replacement price with make/model or comparable links.
- Clear statement of the amount you seek under full-value or released valuation.
Documentation prep before moving day
Many people only start thinking about documentation after something goes wrong. While you cannot go back in time, you can prepare for future moves or supplement your current claim with whatever pre-move evidence you still have.
Pre-move documentation checklist
- Take clear photos or video of valuable or fragile items in their normal location at home.
- Photograph serial numbers, labels, and model numbers on electronics and appliances.
- Save purchase receipts, invoices, or online order confirmations for big-ticket items.
- Download or print product pages showing price and specifications.
- Store digital copies of your move estimate, bill of lading (when available before move), and valuation election.
- Ask the mover to explain valuation options in writing and keep that explanation with your paperwork.
If your move has already happened, look through your email, online orders, and phone gallery. You may already have casual photos that show furniture condition or electronics in good shape before the move. These can still help support your claim.
Set up a simple evidence system
Before or right after moving day, create a basic structure for your evidence:
- A physical folder or binder labeled \\”Move \\u2013 Claim Documents\\” with tabs like \\”Contracts,\\” \\”Inventory,\\” \\”Damage Lists,\\” \\”Estimates,\\” and \\”Correspondence\\”.
- A digital folder in your computer or cloud storage with subfolders for \\”Photos,\\” \\”Video,\\” and \\”Scans\\” of paperwork.
- A running log (spreadsheet or simple list) of damaged or missing items with columns for description, inventory tag, room, estimated value, and evidence available.
How to document damage during delivery walk-through
The delivery day walk-through is one of the most important moments for documenting damage. What you do in those 30-90 minutes can strongly affect how the mover views your claim later.
Step-by-step at delivery
- Be present if possible. If you cannot be there, designate a trusted adult in writing with the mover.
- Use the inventory sheets. As items are unloaded, match the numbered tags to the inventory and note anything that seems damaged or missing.
- Flag visible damage immediately. Point it out to the driver and note it on the inventory or delivery receipt before signing.
- Do an initial walk-through. Before the driver leaves, quickly check key items: TVs, glass, antiques, mattresses, major furniture.
- Take photos before movers leave. Photograph damaged cartons or furniture in the condition you first see them in your home.
What to write on the delivery receipt
The delivery receipt (often part of the bill of lading) usually has a space for exceptions or remarks. Avoid leaving this section blank if you see any issues. Instead of just signing \\”received in good condition\\” when that is not true, you can use wording such as:
\\”Subject to inspection. Visible damage to dining table legs, corner of dresser chipped, box #23 crushed, TV carton torn. Additional concealed damage may be reported.\\”
This does not replace your formal written claim, but it shows that problems were observed at delivery and not weeks later.
Quick delivery-day checklist
- Have your inventory sheets ready and a pen or marker.
- Walk with the movers as they unload high-risk items.
- Note obvious damage or missing cartons on the inventory and delivery receipt.
- Take time-stamped photos of any damaged boxes or furniture on the spot.
- Do not sign forms that say \\”no damage\\” if you have seen damage.
- Ask for a copy or photo of anything you sign.
Taking effective photos and video of moving damage
Photos and videos are the backbone of most household goods claims. Poor or incomplete images are a common reason claims get reduced.
What to capture in your photos
- Context shots: Take a wide photo showing the entire item in the room.
- Close-ups: Then zoom in on the specific damage from multiple angles.
- Labels and tags: Photograph inventory stickers, serial numbers, manufacturer labels, and model numbers.
- Packaging damage: If a box arrived crushed or torn, photograph it before fully opening.
- Comparison shots: If you have pre-move photos, place them side-by-side in your claim file with the new photos.
Technical tips for better evidence
- Turn on the date and time stamp feature on your camera or keep original file metadata.
- Use natural light where possible; avoid blurry or very dark images.
- Take several photos of the same area so you can choose the clearest ones.
- Avoid heavy filters or editing that could make the damage look exaggerated or unclear.
- Save files with names that match your damage list (for example, \\”Item12_dining_table_leg_gouge.jpg\\”).
| Photo Type | Purpose | Practical Example |
|---|---|---|
| Full item view | Shows what the object is and general condition | Entire sofa showing torn armrest area |
| Close-up of damage | Proves the specific damage and severity | Zoomed-in shot of deep scratch in wooden table |
| Packaging/carton | Supports that damage occurred in transit | Crushed TV box with \\”This Side Up\\” arrow crushed |
| Labels and serials | Identifies model and value | Photo of TV model number on back panel |
How to describe damage clearly on paperwork
Adjusters read dozens of claims every week. Specific and neutral descriptions carry more weight than vague or emotional language.
Good vs. weak descriptions
| Weak Description | Stronger Description | Why It Helps |
|---|---|---|
| \\”Table broken\\” | \\”Solid wood dining table, 72 inch, two legs cracked at joint and top surface gouged approximately 4 inches by 1 inch near center.\\” | Shows item type, size, and specific damage. |
| \\”TV damaged\\” | \\”55 inch Samsung LED TV, model UN55xxxx, screen cracked from upper right corner to center, will not power on.\\” | Identifies exact item and functional problem. |
| \\”Box missing\\” | \\”Carton #23 from inventory, labeled ‘Kitchen Fragile’, not delivered. Contains dishes, glassware, and blender.\\” | Connects to inventory and contents. |
Writing your damage list
Create a damage log or spreadsheet with these columns:
- Item number (you can assign your own if needed).
- Inventory tag number (if any).
- Room and brief item description.
- Type of problem (damaged, missing, delayed).
- Detailed description of damage.
- Estimated repair or replacement cost.
- Evidence attached (photo file names, receipt, estimate).
When you later submit your written claim, you can attach or embed this list so the mover can see exactly what you are claiming.
Key documents that support your claim
Your paperwork is the framework for everything else. Claims departments rely heavily on three core documents: the bill of lading, the inventory, and your valuation election (sometimes on a separate form or on the bill of lading itself).
Essential documents checklist
- Bill of lading (pickup and delivery pages, including signatures).
- Order for service or written estimate (binding or non-binding).
- Valuation election or addendum (full value protection vs. released rate).
- Household goods inventory sheets (including condition codes at origin).
- Delivery receipt with any notations you added.
- Packing list if the mover provided packing services.
- Any emails or texts confirming special handling or extra coverage.
- Claim form required by the mover (when you are ready to file).
| Document | What It Shows | How It Helps Your Claim |
|---|---|---|
| Bill of lading | Contract of carriage, dates, basic terms | Establishes mover\\u2019s responsibility and timeline. |
| Inventory | List of items loaded, tag numbers, origin condition codes | Links each item to what mover accepted and its prior condition. |
| Valuation form | Your selection of released or full-value coverage level | Determines payment limits and whether depreciation applies. |
| Estimates/receipts | Purchase price, age, repair cost | Supports the dollar amounts you are claiming. |
How to organize your evidence file
A clean, organized claim file makes life easier for everyone. It reduces back-and-forth requests for more information and helps show that you are a serious, credible claimant.
Suggested structure for your file
- Section 1: Summary cover letter \\u2013 one or two pages explaining what happened, key dates, and a summary of your total claimed amount.
- Section 2: Damage list \\u2013 your spreadsheet or table listing all damaged, missing, or delayed items.
- Section 3: Photos and video \\u2013 grouped by item number, with captions or file names that match your damage list.
- Section 4: Receipts and proof of value \\u2013 purchase invoices, online orders, product pages, and appraisals.
- Section 5: Repair or replacement estimates \\u2013 contractor quotes, furniture repair bids, or screenshots from reputable retailers.
- Section 6: Moving paperwork \\u2013 bill of lading, inventory, estimates, valuation forms, delivery receipt, addenda.
- Section 7: Correspondence \\u2013 emails, letters, and texts with the mover or claims company.
Labeling and indexing evidence
To avoid confusion, label each item consistently across your documents. For example:
- Assign an internal ID: \\”Item 01, Item 02,\\” etc.
- Use that ID in your damage list, photo file names, and repair estimates.
- Include a simple index at the front of your claim file: \\”Item 01 \\u2013 Dining table \\u2013 see Photos 1-3, Receipt A, Estimate R1.\\”
Valuing damaged and missing items
Knowing how to calculate what you are asking for is just as important as proving the damage itself. What you can claim depends heavily on whether you chose released valuation (often $0.60 per pound per article for interstate moves) or some form of full-value protection.
Typical ways to support value
- Original receipts or invoices showing purchase price and date.
- Credit card or bank statements tied to a purchase.
- Online order history (e.g., retailer order pages).
- Current product pages showing the cost to replace with the same or comparable item.
- Written repair estimates from local vendors.
- Appraisals for antiques, artwork, or specialty items when available.
Example value calculation table
| Item | Evidence of Value | Claimed Amount (Example) |
|---|---|---|
| Dining table | Receipt from 2019: $1,200; repair estimate: $350 | Full-value: $350 repair; Released: weight x $0.60 |
| 55\\” TV | Order confirmation: $600 in 2021; no repair possible | Full-value: comparable replacement cost; Released: weight x $0.60 |
| Box of dishes | Retailer product page: $200 for new set | Claim replacement cost or per-pound limit depending on coverage |
In your written claim, tie each claimed amount back to a specific piece of documentation so the adjuster can quickly verify it.
Depreciation, valuation options, and liability limits
Even with perfect documentation, the amount you receive can be limited by the valuation level and terms you agreed to in writing. Documentation helps you ensure the mover correctly applies those limits rather than using them to underpay beyond what the contract allows.
Released vs. full-value protection (general concepts)
- Released valuation: Often set at $0.60 per pound per article for interstate shipments. Payment is based on weight, not actual value, which can be much lower than your loss.
- Full-value protection: Usually requires the mover to repair, replace with items of like kind and quality, or pay for replacement (subject to certain limits and deductibles). Some carriers apply depreciation depending on their tariff and your contract terms.
Check your bill of lading and valuation election form for details. For intrastate moves, state rules or tariffs may use different formulas.
Using documentation when depreciation is applied
Carriers sometimes apply depreciation based on age and condition. Your documentation can help counter excessive depreciation by showing:
- Proof of purchase date instead of the mover assuming an older age.
- High-quality brand or construction that tends to hold value longer.
- Excellent pre-move condition supported by photos.
- Professional appraisal for antiques or specialty items.
Common documentation mistakes (and how to fix them)
Many consumers make similar errors when documenting damage. Knowing these in advance can help you avoid them or correct them quickly.
| Common Mistake | Why It Hurts the Claim | Better Approach |
|---|---|---|
| Waiting weeks to note damage | Mover may argue damage happened after delivery. | Note visible damage on delivery paperwork and start your list within days. |
| Only sending a few photos | Adjuster lacks detail to properly assess loss. | Provide multiple angles, context shots, and close-ups. |
| No proof of value | Mover may substitute low generic values. | Gather receipts, statements, or current replacement prices. |
| Unorganized submissions | Claims staff struggle to link items to evidence. | Use an index and consistent ID numbers across documents. |
Checklist: fixable documentation gaps
- If you failed to note damage on delivery, document when you discovered it and why the delay occurred (for example, delayed unpacking). Provide detailed photos and explanation.
- If you lack receipts, pull bank or credit card records or screenshots of similar items with reasonable prices from reputable retailers.
- If your photos are blurry, retake them and resubmit with clearer labeling.
- If your initial written claim was vague, send an updated, more detailed damage list referencing your earlier notice.
Claim timelines and documentation deadlines
Carriers usually impose deadlines for filing written claims and may have timelines for responding. For interstate moves, federal regulations in 49 CFR Part 370 provide a framework for claims handling, but your specific deadlines will be in the mover\\u2019s bill of lading and tariff. For intrastate moves, state regulations or contracts set the rules.
Typical claim stages (example)
| Stage | What You Do | Documentation Focus |
|---|---|---|
| Delivery + first week | Note visible damage, start list, take photos, save boxes. | Delivery receipt notes, initial photo set, inventory notes. |
| Within claim-filing deadline | Submit written claim with damage list and evidence. | Organized file: photos, receipts, estimates, contracts. |
| Mover review period | Answer follow-up questions, provide additional documents if reasonable. | Clarifications, extra photos, missing paperwork. |
| Settlement or denial | Review offer, negotiate, or consider arbitration/escalation. | Summaries, counter-calculations, any new expert opinions. |
Always confirm your actual claim filing deadline by checking your bill of lading, tariff, and the mover\\u2019s written claim instructions. Missing a deadline can severely limit your options, no matter how strong your documentation is.
How movers and adjusters review your documentation
Once you submit your written claim, the mover or its third-party claims administrator typically follows an internal procedure. Understanding their point of view can help you respond more effectively.
What they usually look for
- Whether your claim was filed on time and in the required form (often written, sometimes on their claim form).
- Whether each item on your list appears on the inventory or was acknowledged as part of the shipment.
- Whether the inventory condition codes at origin contradict your damage claims.
- Whether your photos reasonably show transit-related damage.
- The valuation level you selected and any deductibles or limits.
- Reasonableness of your claimed amounts versus repair/replacement options.
How to respond to questions and requests
If the adjuster asks for more information, respond in writing and keep it factual. For example:
\\”Per your request, attached are additional photos of Item 05 (dresser) taken the day after delivery, showing the cracked drawer front from different angles. I have also included a copy of the purchase receipt from 2020.\\”
Stay organized and reference your item numbers so they can easily match your response to the file.
Using documentation to counter low settlement offers
Even with solid documentation, your first settlement offer may be lower than you believe is fair. Before rejecting or accepting, compare the offer carefully against your evidence, contract terms, and valuation choice.
Steps to review and challenge an offer
- Compare their payment line-by-line to your damage list.
- Note where they applied weight-based limits or depreciation, and confirm those match your valuation terms.
- Check whether any items were denied due to alleged pre-existing damage or inadequate proof.
- Prepare a short written response explaining where you disagree and why, with references to documents.
Sample negotiation wording:
\\”Regarding Item 03 (solid wood coffee table), your offer of $40 appears to be based on a per-pound limit. However, my bill of lading and valuation addendum show that I elected full-value protection with a declared value of $75,000 and no deductible. Attached again are the purchase receipt for $450 and the repair estimate of $180. Based on this documentation and the elected valuation, I respectfully request reconsideration of the amount offered for this item.\\”
When to escalate: complaints, arbitration, and court
If negotiations stall or you strongly disagree with a denial, your documentation becomes even more important in escalated forums such as regulatory complaints, arbitration, or small claims court.
Common escalation paths
- Company internal escalation: Asking for a supervisor review within the mover\\u2019s claims department.
- FMCSA complaint (for interstate movers): Filing a complaint with the Federal Motor Carrier Safety Administration\\u2019s National Consumer Complaint Database if you believe federal rules or contracts were violated.
- State consumer agency or public utilities commission: For intrastate moves regulated at the state level.
- Arbitration: Many interstate movers must offer arbitration for certain disputes, especially over loss and damage claims.
- Small claims or civil court: Where allowed and appropriate; consider legal advice before proceeding.
In all of these settings, the decision-maker will rely heavily on documents and evidence rather than verbal arguments alone. A well-organized file that clearly shows dates, conditions, values, and contract terms gives you the best chance to present your side effectively.
What not to sign or say too early
Under stress, it is easy to sign or say things that later work against your claim. Slow down and protect your position.
Documents to read carefully
- Delivery receipts that include pre-printed statements like \\”Received in good condition\\” when you see visible damage.
- Release or waiver forms that might resolve the claim for a small payment.
- Documents that include broad releases of liability beyond the specific claim.
If you are unsure what a form means, ask the mover to explain it in writing or consult a qualified professional. You generally can and should still document damage fully even if you feel pressured at delivery.
Statements to avoid
- Admitting blame (\